
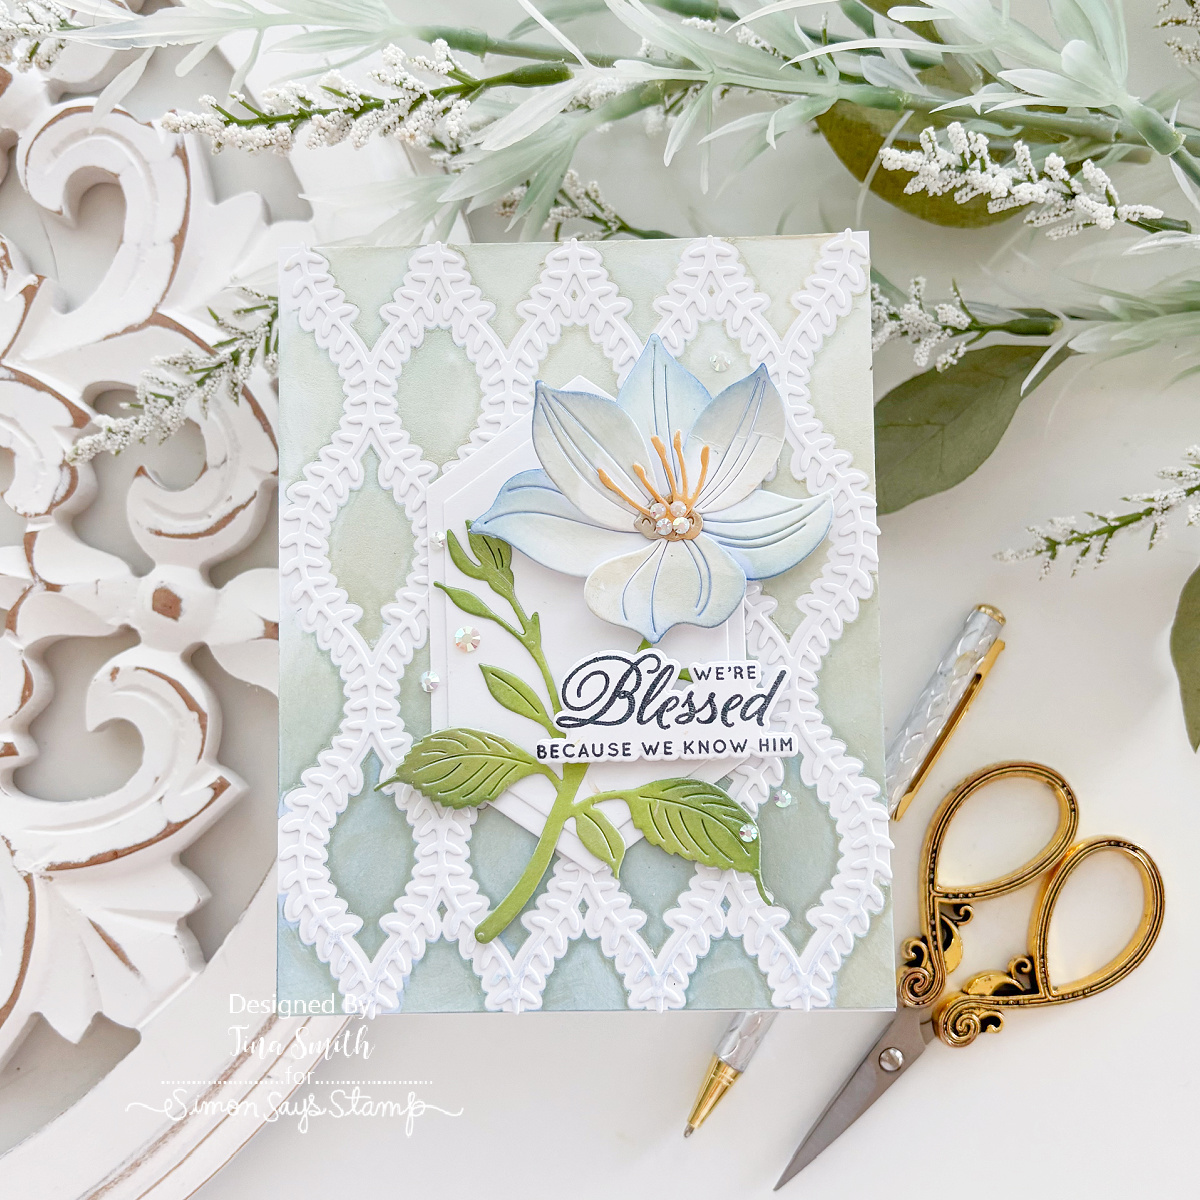
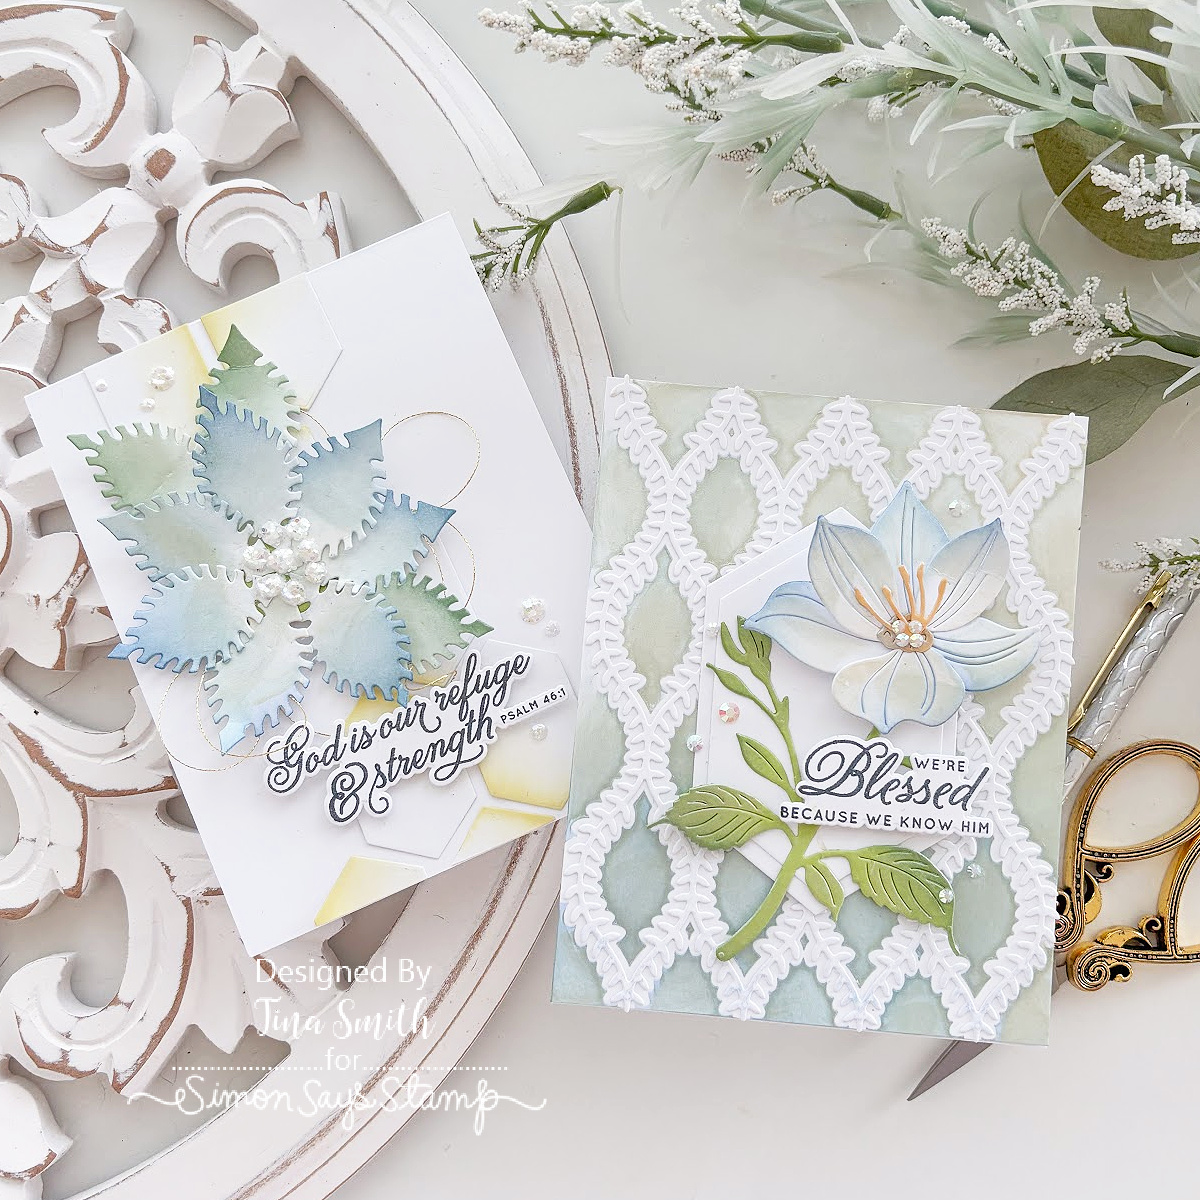
Hello there, amazing cardmakers! Glad you stopped by the blog today. We are rolling right into Day 2 of the new Simon Says Stamp “Always There” release celebration, and I have a fun double-feature for you. oday’s main project features the Luna Flower Wafer Die as my centerpiece.
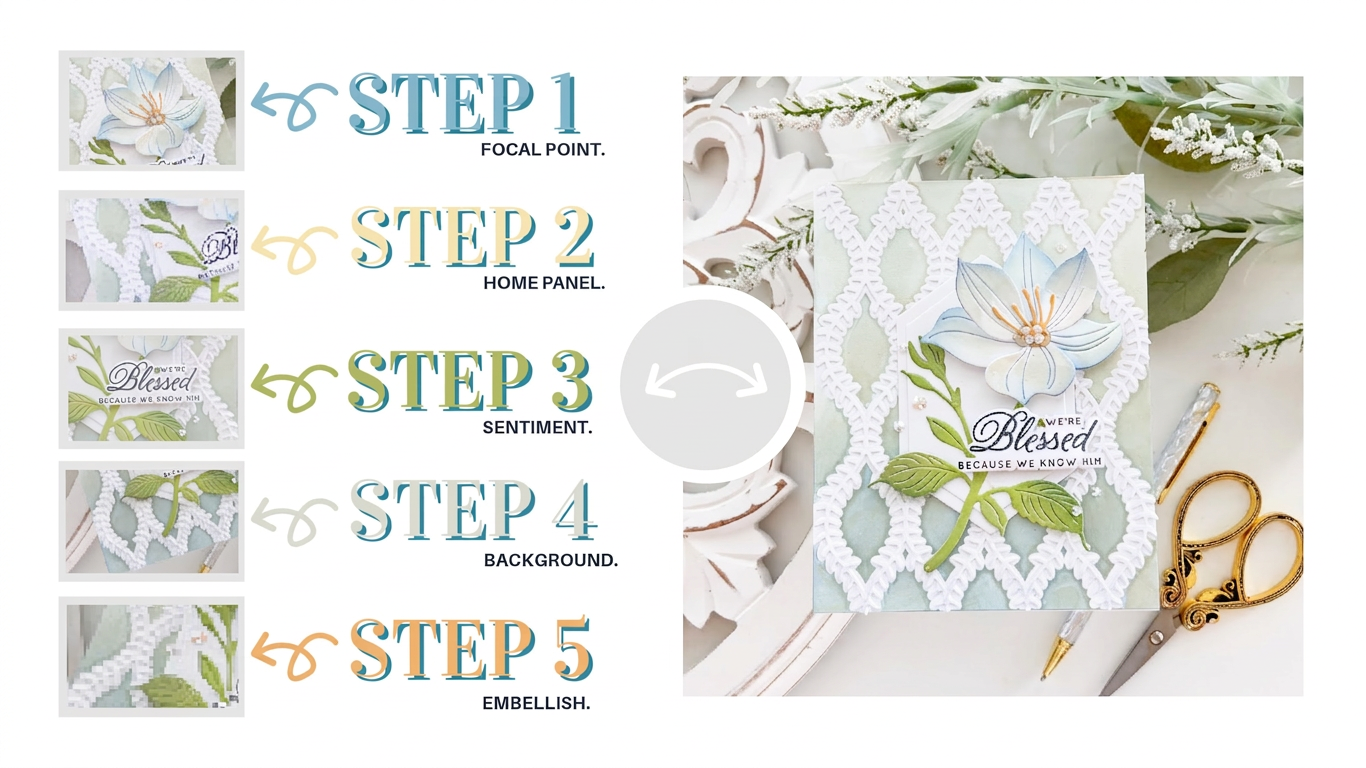
I also used the Simon Says Stamp Stencils and Die Willowweave set. Together, they create this really neat, intricate background pattern that instantly made me want to create a vintage-style card using soloar past for that sublte shimmer. To make it easy to follow, I broke the whole design process down into a simple 5-step formula.
Ready to see how they came together? Scroll down to watch the full video tutorial!
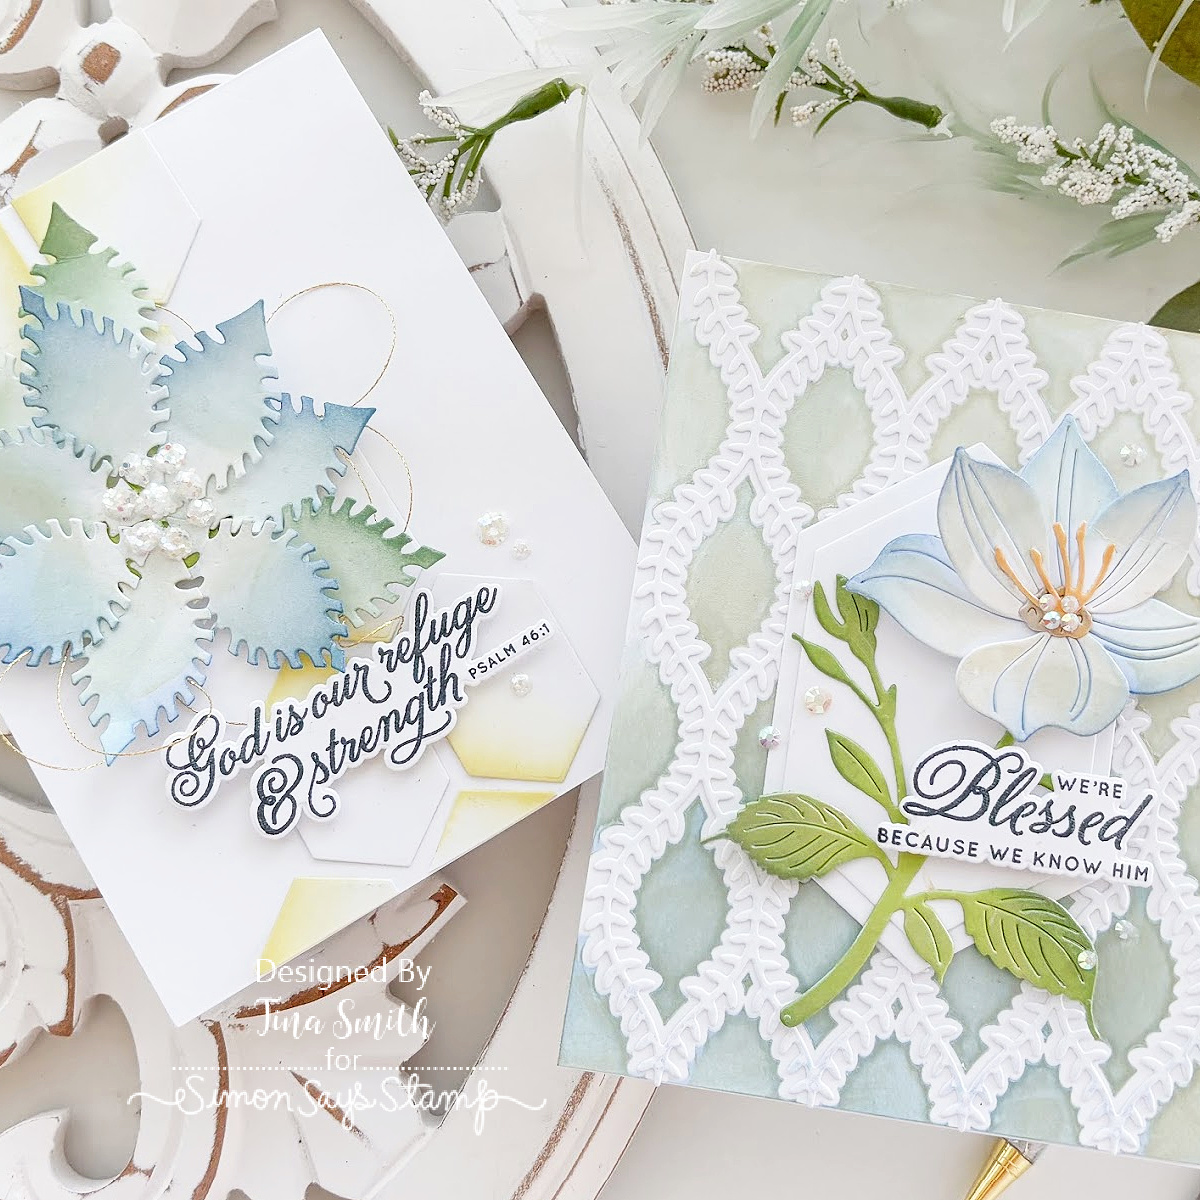
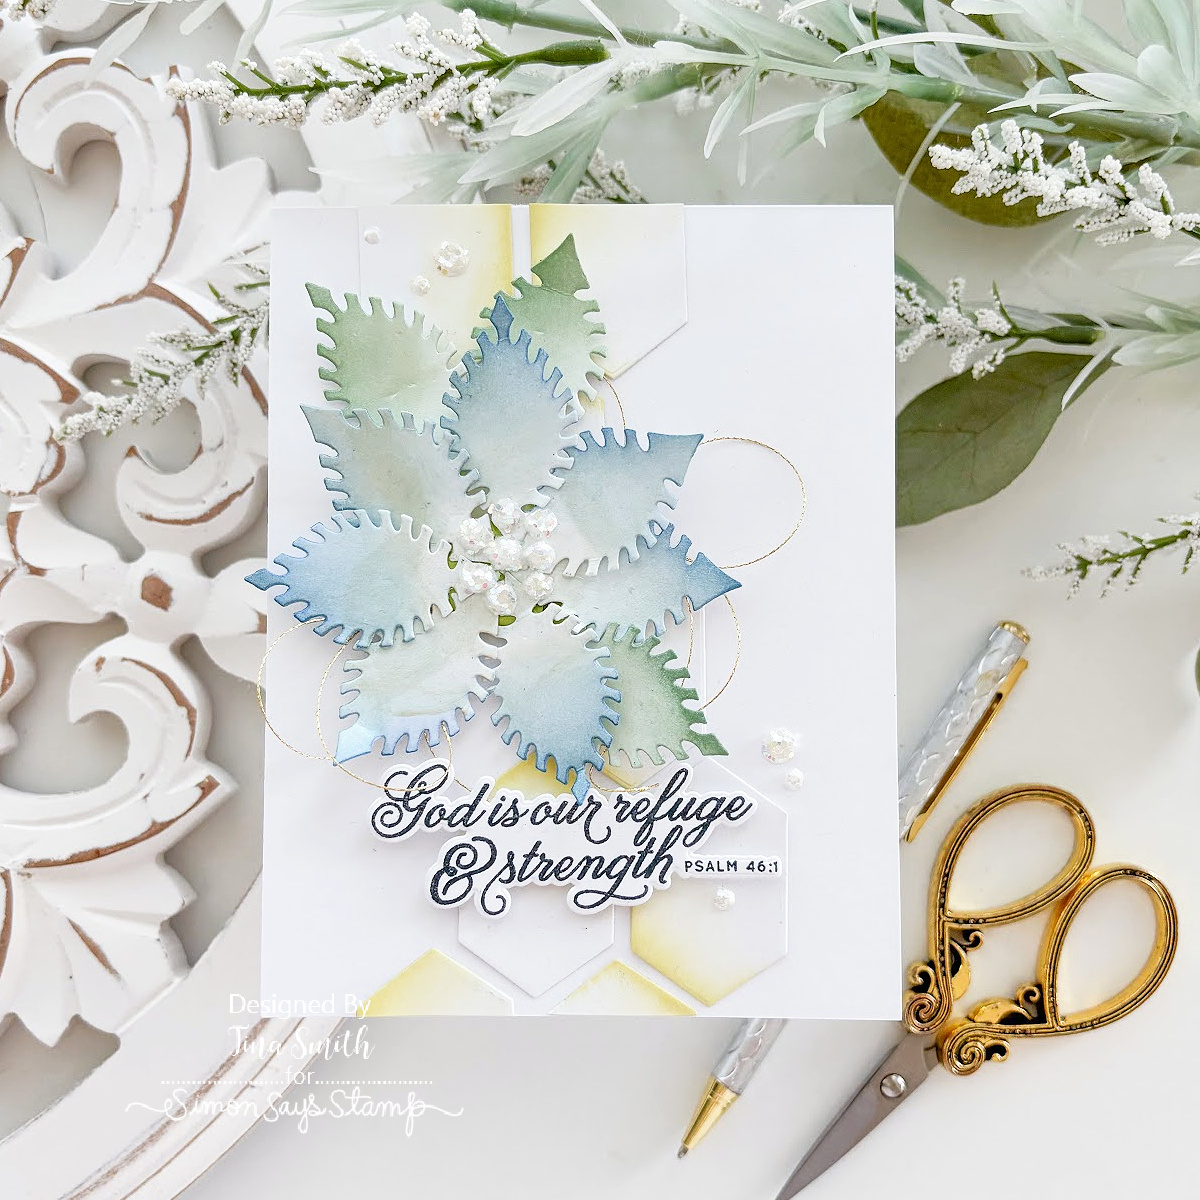
But wait, there’s more! I had a bunch of leftover negative pieces from die-cutting that background, and I absolutely refuse to let good paper go to waste. So, I gathered up those scraps and built a second card out of the leftovers. Both cards feature sentiments from the Blessed Stamp and Die bundle, which has some of the most beautiful faith-based greetings with a beautiful font.
Check out the Entire Always There Release Here!
Looking for a home to share your “ALWAYS THERE” projects or just looking for inspiration? You MUST check out the Simon Says Stamp Gallery!! So many amazing creative cards & projects are all in one spot, CLICK HERE TO VISIT!
Supplies
A Detailed Supply List is int he Description Area of the How-To Video:)
Simon Says Luna Flower Die Set,
Simon Says Willowweave Stencil and Die Set,
Click Here or Below to Watch the Tutorial
Day 2 – Blog Hop Line Up
- Simon Says Stamp Blog
- Barbara Tarayao
- Emily Midgett
- Nichol Spohr
- Nicky Meek
- Tina Smith >>>> YOU ARE HERE ❤️
- ❤️NEXT UP IS THE AMAZING >>>>> Heather Ruwe
- Keisha Charles
- Lisa Addesa
- Sandi MacIver
- Miriam Prantner
- Alberto Gava
- Caryn Davies
- Kath Stewart
- Carly Minner
- Natasha Polite
Discover more from Cards and Coffee Time
Subscribe to get the latest posts sent to your email.


This is GORGEOUS! The colors and shine are wonderful, as well as the design!
LikeLike
Oh Tina, At first glance I immediately thought “typical Tina” but that didn’t sound right or certainly not enough so I had to tweak that thought to be “classic Tina” which means BEAUTIFUL & CREATIVE. Your first card using the beautiful new die cut flower placed on top of of that fabulous Willow weave die cut is gorgeous, the ink blending behind the die cut adds the perfect amount of softness BUT you weren’t done, you had to take the cut outs from the Willow weave plate and make your own flower, that was a classic Tina move, one filled with creativity. Most of us (or at least I) would have tossed those pieces in the trash but you made a flower with them. Your creativity never ceases to amaze me. Stunning, just stunning !!!
LikeLike
So very pretty, I can’t wait to watch your video. I really like your 5 steps approach and I really want to see the blending – it’s gorgeous!
LikeLike
Stunning! Love your 5 step series, it’s so helpful. As always, beautiful work!
LikeLike
I always enjoy your videos Tina … they are so inspiring and so easy to follow. I think I love the Willowweave die the most. Using the negative pieces to make your beautiful flower was brilliant. I am encouraged to buy and try it myself! Great job … as usual! 🙂
LikeLike
Very creative, I kept looking at the flower made of scraps and thinking, “what die made that flower? I don’t remember that.” Very inspired.
LikeLike
Your cards are very beautiful, and I love how you finish cards in 5 steps. That’s really cool. Thank you for inspiring me today.
LikeLike
So cute! Thanks for sharing!
LikeLike
Wow! These cards are gorgeous! I love the soft colors paired with white- so dreamy and elegant!
LikeLike
Beautiful!! Simply beautiful. Love your Ink blending. Looking at your cards encourages me to do more ink blending! TY!! 🩷
LikeLike
Love both of your cards and the fact you made a flower card with the leftovers from the die. Thanks for sharing.
LikeLike
These are beautiful!
LikeLike
Love your work!! That solar paste from Simon really made the card and I adore that you did not just toss those pieces from the Willowweave die. They made a cool flower!
Lori S in PA
LikeLike
This!! This is why I save all my scraps and bits left after I die cut things. You’ve given me an idea that I’m going to have to act on now. Thanks!!
LikeLike
Love those colors and your creativity on the 2nd card
LikeLike
Oh wow!! These cards are beautiful! And I loved how you used the cut out bits from the background to make a flower! I wish I would have great ideas like!!
LikeLike
Lovely colors and creativity
LikeLike
Your card has amazing texture!
LikeLike
Absolutely gorgeous, Tina!
LikeLike
So stunning! I love the soft colors
LikeLike
absolutely gorgeous! I love what you did with the negative cuts.
LikeLike
These are soooo elegant! Gorgeous designs!
LikeLike
The blues and light greens look so pretty! I have a thing for blue flowers.
LikeLike
Lovely cards Tina. Love how you used the negative pieces to make a flower! So clever! Pretty soft hues! Thank you for the inspiration!
LikeLike
I love both of your cards! Love the way you used the negative pieces from the background to make a flower. So creative! God is good!
LikeLike
Pretty florals!
LikeLike
Beautiful card! You always inspire me Tina! 🩷🌸🩷
LikeLike
Gorgeous card with the awesome background die cut design, and a fabulous use of the leftovers for your second card! So clever!
LikeLike
so so so pretty! 🙂
LikeLike
That luna flower is such an elegant floral & I love the two cards you created.
LikeLike
GORGEOUS CARDS!
LikeLike
Just watched your video and both of your cards are gorgeous. Not surprised that you would see a clever way to use the cut outs from the cover die!
LikeLike
Just watched your video and I love both of your cards and was not surprised to see that you saw a way to. use the cut outs from the cover die! So clever and beautiful!
LikeLike
Beautiful and elegant! FAB designs and love your colors!
LikeLike
Stunning cards. Very elegant
LikeLike
Both cards are absolutely beautiful & delicate. I truly love your sentiment choices and ordered the set! Also, great way to use up those leftover die cuts from the lattice – those flowers are awesome! Thank you so much for sharing your amazing talent and for the great inspiration!
LikeLike
Your creativity knows no bounds, Tina! Love both of these gorgeous cards so much.
LikeLike
Tina your cards are stunning. So delicate and dimensional. You truly amaze me with your creativity. Thanks for sharing.
LikeLike
Tina, I am always in awe of how you come up with beautiful and unique designs and these cards are no exception. Thanks for sharing!
LikeLike
Beautiful elegant cards and I love the color combo!
LikeLike
Absolutely lovely cards! The colors are beautiful and I love that you used “leftovers” for the second card.
LikeLike
These are gorgeous! I love the soft colors and calming shade of blue you used.
LikeLike
luv these and that you used the bits from the first on the other very cool -kathy
LikeLike
Very pretty cards. I love the soft colours.
LikeLike
Such beautiful cards!
LikeLike
Beautiful color! Amazing!
LikeLike
so pretty
LikeLike
Peaceful dreamy hues Tina! LOVE the soft palette and restful feel of these cards xoxo
LikeLike
Tina, your cards are gorgeous–I love the Luna flower die and just purchased it! Thanks for the inspiration and motivation!
LikeLike