

Hello Crafty Friends and Happy Tuesday! Let’s talk about Craft Room Organization! I am sharing a few Craft Room Organization Tips on my stamp and die storage – the how’s and where’s!! Plus a mini craft room tour. Instead of a card tutorial I thought I would share a little bit about my crafty space and how I store my Stamps and dies.
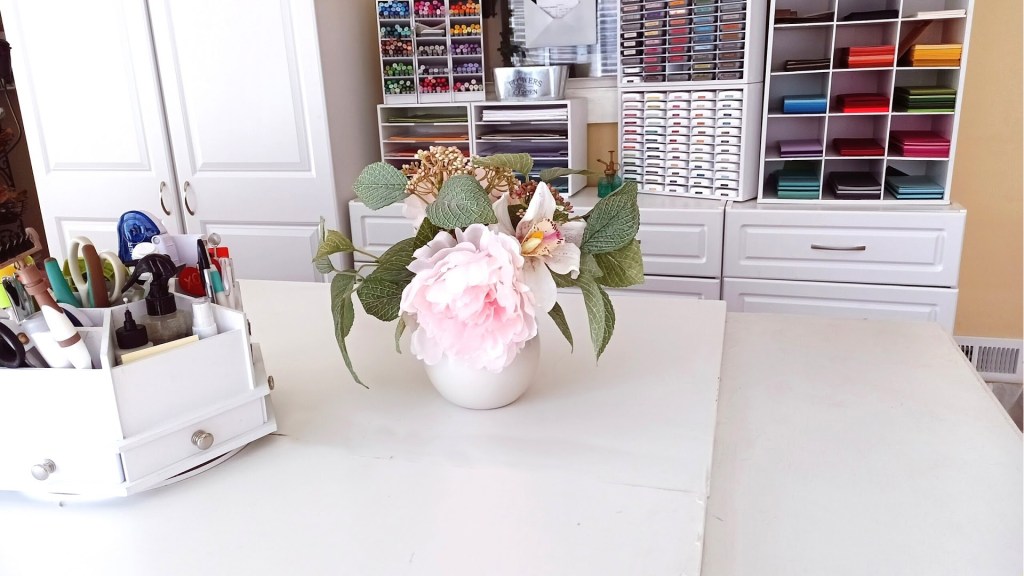
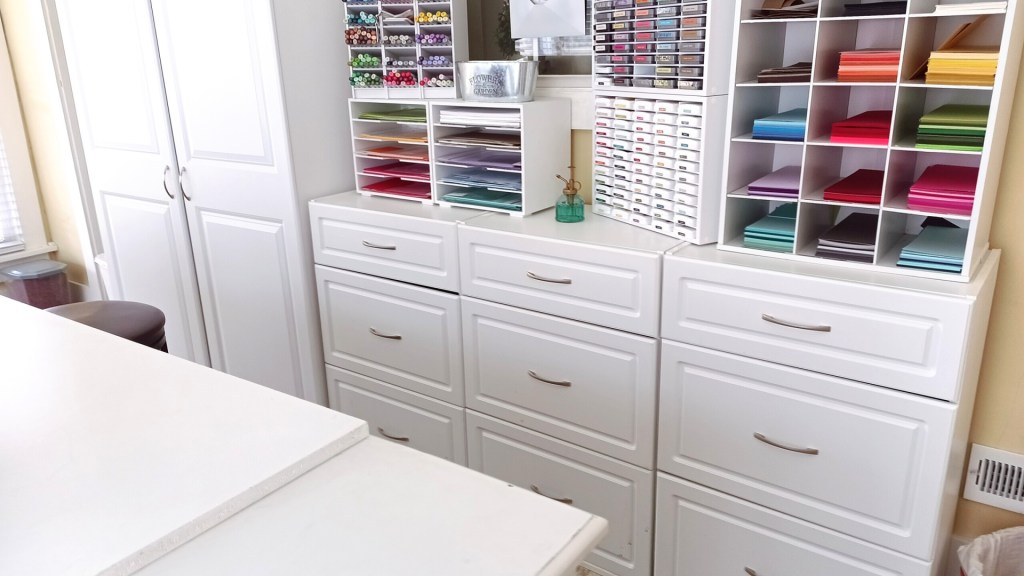
I love these 3 Drawer Units, they are supposed to have feet but I chose not to use them. They work perfect for craft storage along with the 2 Door Cabinet (shown in the video). I have 2 systems I use for my colored cardstock. The one in the front is actually a shoe organizer, it works out great as I cut my paper length wise to store it. This has FSJ Cardstock, Hero Hues Cardstock and Concord & 9th Cardstock in it. My Copic Marker Storage Cubbies and my Ink Storage units (1 have 2 stacked) are from Organize More. The Cardstock organizer on the left stores my full size sheets of the new Spellbinders Color Essentials Cardstock🙂 The pretty bottle that looks like a fancy oil can is a mister that I picked up at my local store. I put a cleaner in it an use it to clean my craft desk:) Below I have more details on my stamp and die storage, enjoy!
Stamp Pocket & Die Pocket Storage


Above are the 3 items I use to create my stamp & die storage pockets, I do add a white cardstock insert to all my storage pockets. The pocket is a 5-5/8″ X 7-3/8″ Pocket from Amazon. I trim off the closure, I tape an insert cardstock sheet to back of a Spellbinders Large Storage Tab. This goes in the pocket to create my stamp storage pockets.
I number mine because I limit myself to 100 stamps. The insert sheet measures 5-1/2″ X 7″. It’s the same size as the Spellbinders Large Storage Tabs.
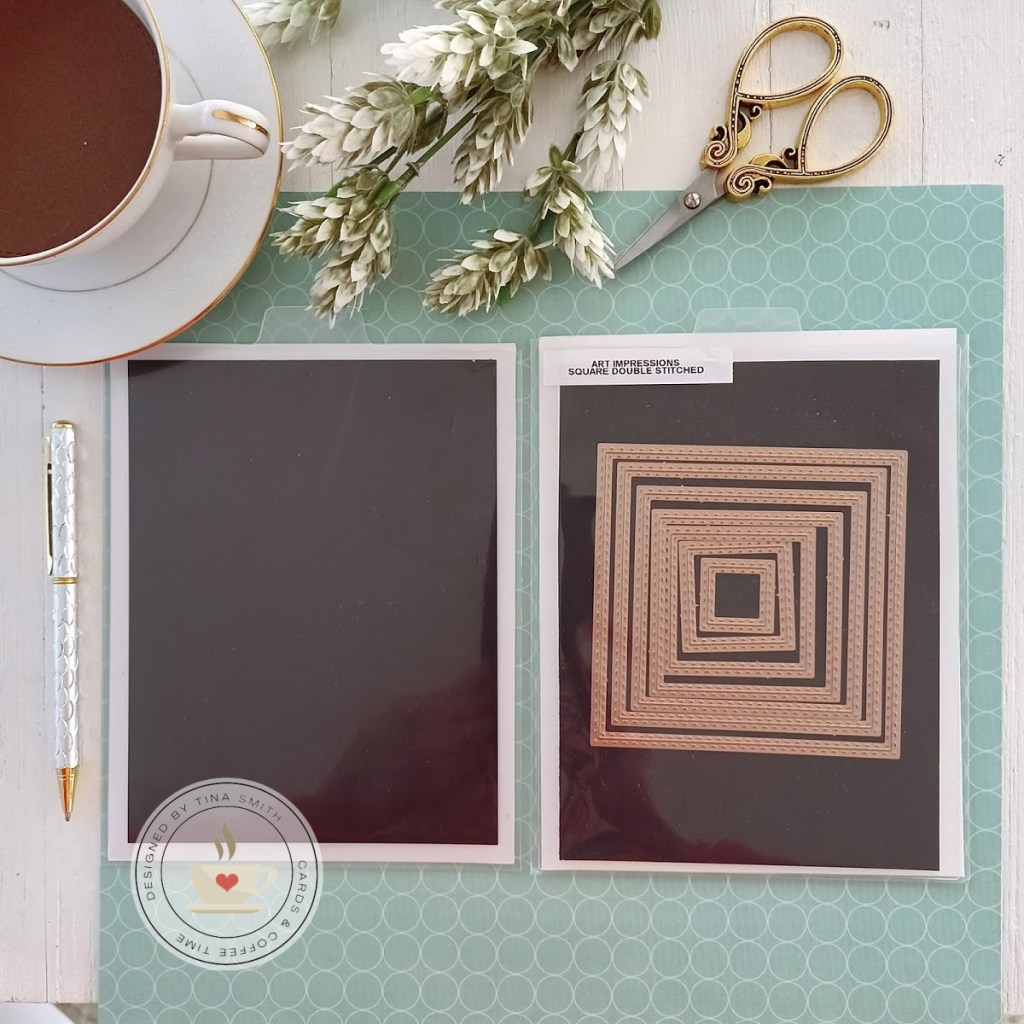
After creating the same pocket for my stamp storage it is easy to create my die storage. I use the Marietta Magnetics Adhesive Sheets 8.5″ x 11″, I trim one sheet to create 2 full die pockets, 2 stamp & die storage (below) and put the left over strip into a scrap envelope:)
The magnetic sheet is trimmed into two 5″ X 6-1/2″. I just remove the release paper and adhere it to the Spellbinders Large Storage Tabs.
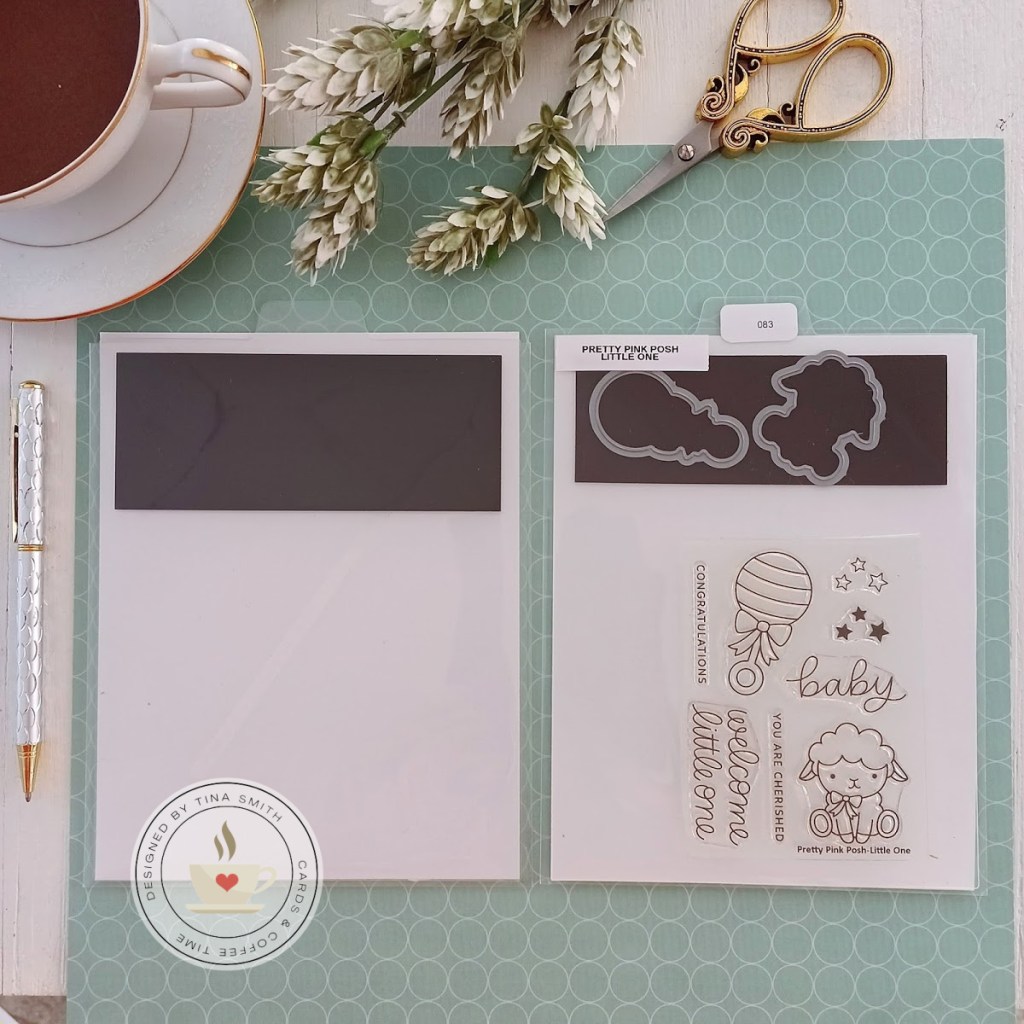
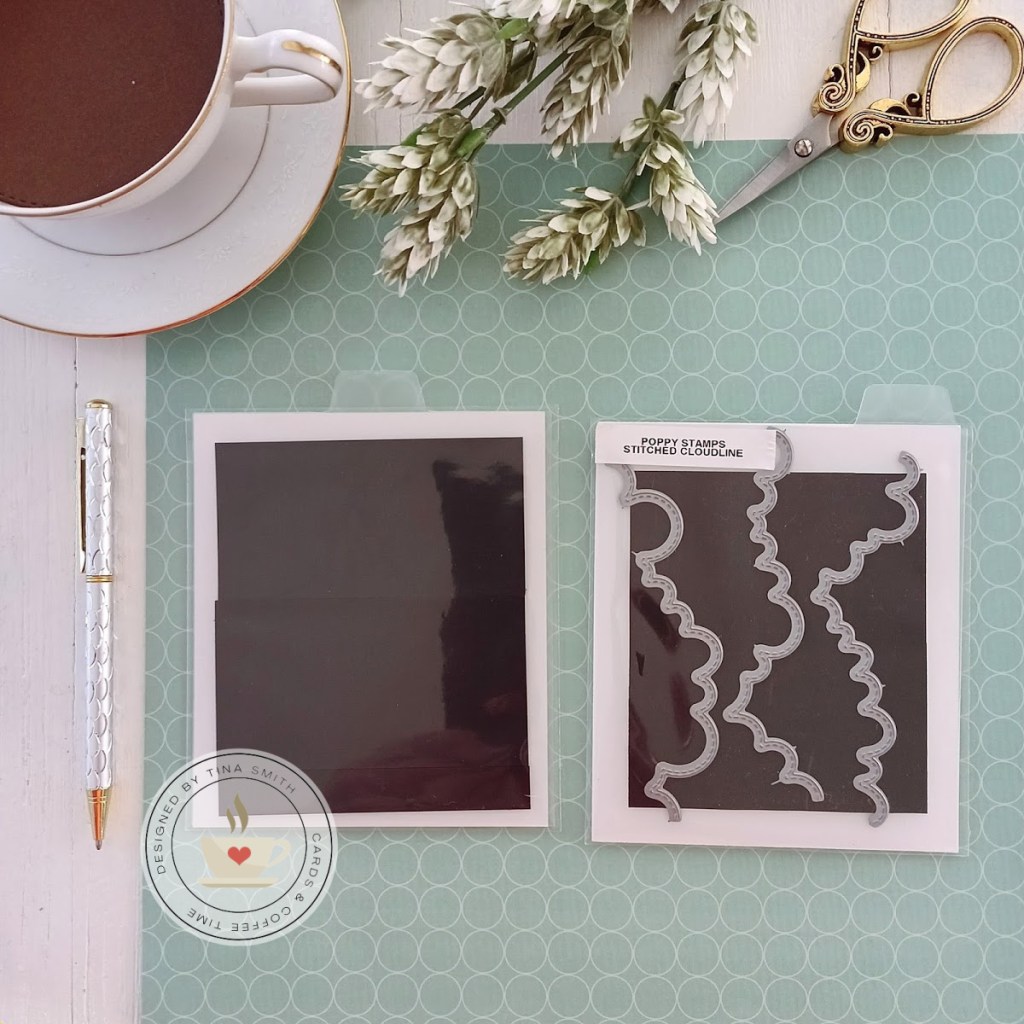
I use the leftover piece of magnet from above to create my stamp & die storage pocket. I create the basic stamp pocket just adding the magnet.
It is perfect for smaller stamp sets that have coordinating dies.
Small Die Storage Pockets

Above are the 3-4 items I use to create my small die storage pockets, I do add a white cardstock insert to all my storage pockets. The pocket is a 4.5″ X 5″ Pocket from Totally Tiffany. I trim off the closure, I tape a white cardstock insert cardstock sheet to back of a Spellbinders Small Storage Tab. This goes in the pocket to create my small die storage. I DO NOT recommend these pockets as they are very thin and tear on the left and right easily. The Spellbinders/FSJ Small Storage Tabs are meant to work with the Spellbinders/FSJ Small Storage Pouch (shown on the right) they are amazing quality, heavy duty and durable. They do have a gusset on them that make my filing system bulky. That is the only reason I do not use them. I eventually will find a small storage system I like and will share it with you when I do:)
Stencil Storage

Above are the pockets I use to create my stencil storage, I do add a white cardstock insert that measures 6 x 6-1/4″ to the storage pocket. The pocket is a 6.75″ X 6.5″ Pocket from Totally Tiffany. This goes in the pocket to create my stencil storage. These pockets are on the thinner side and tear on the left and right once in a while, since stencils are thin I would say these are an okay storage suggestion….until I find better quality pockets that I like and will share it with you when I do:)
6 X 6 Stamps & XL Embossing Folder Storage
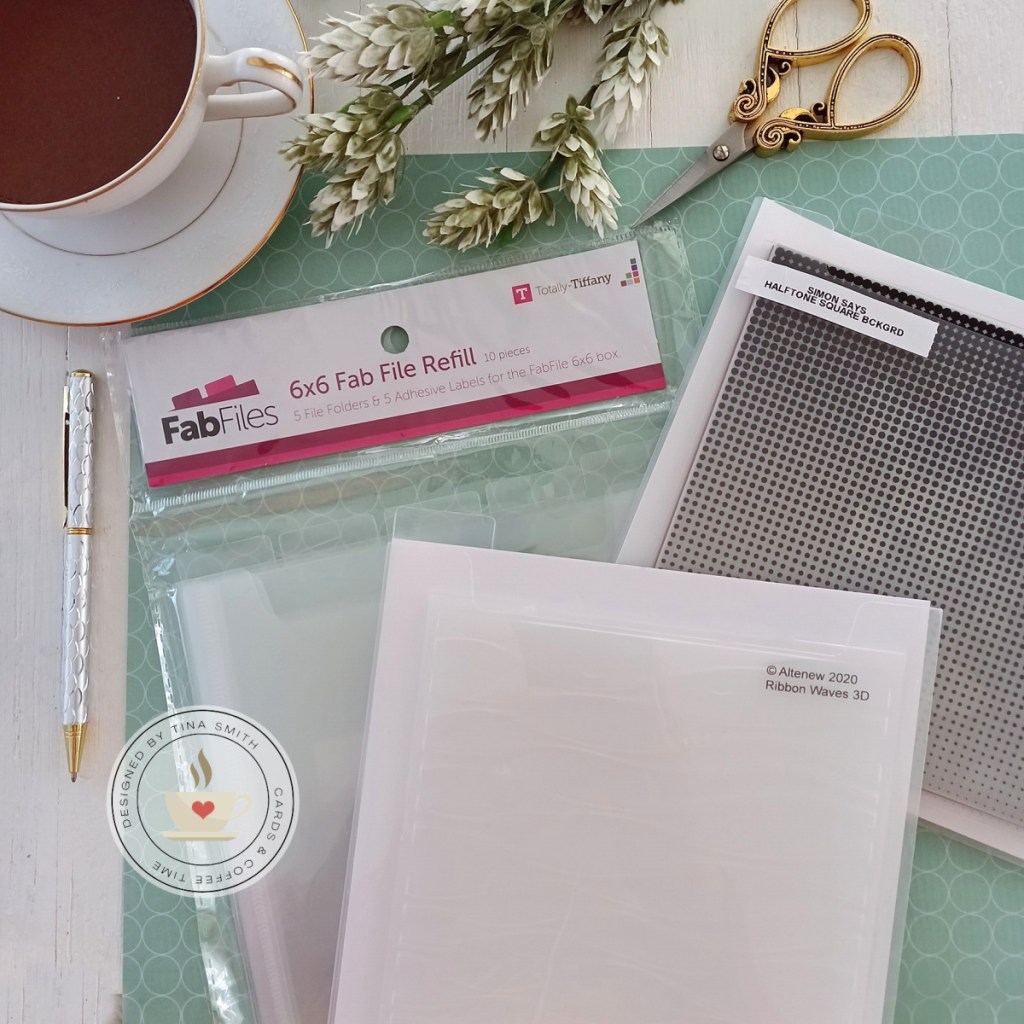
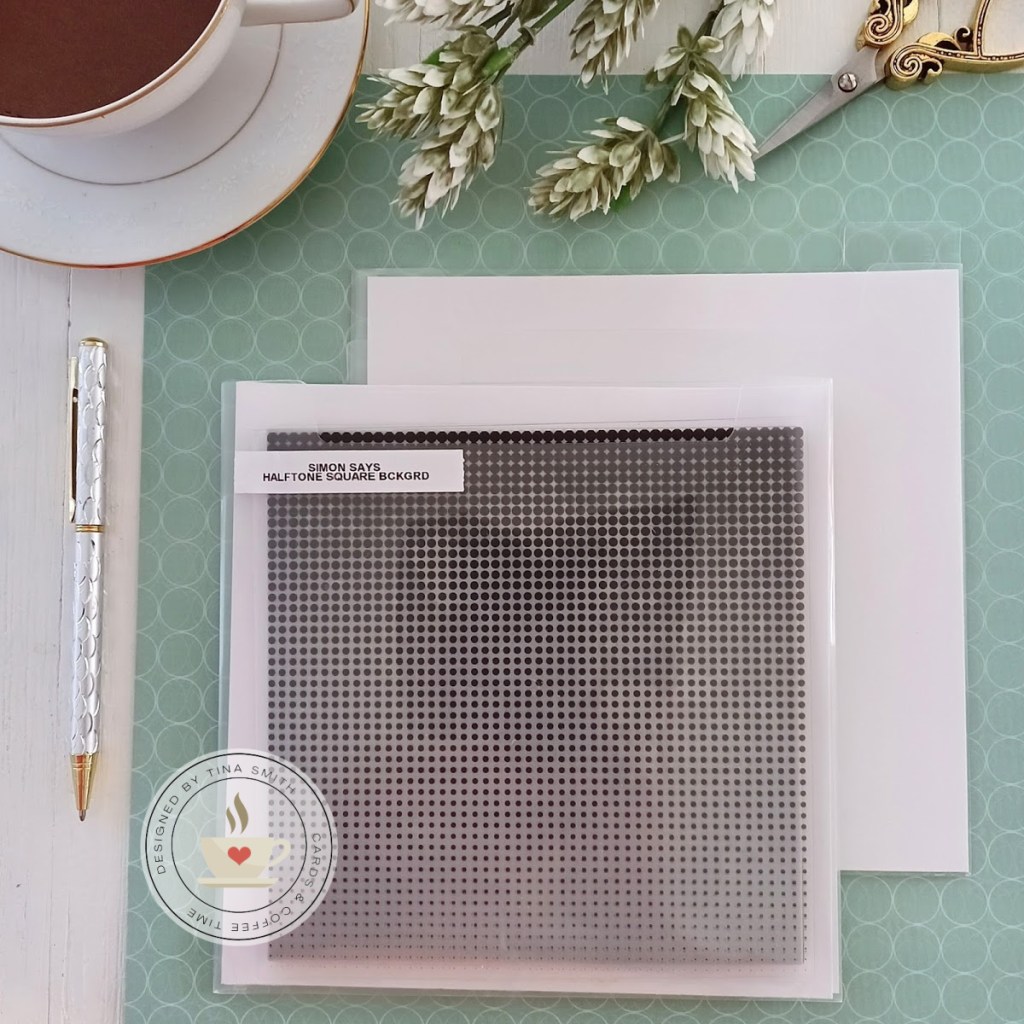
I use the Totally Tiffany 6×6 Fab File Refill for my 6×6 background stamps. These are heavy duty and durable pockets with a file tab at the top. I add a 6.75 x 6.75″ white cardstock insert to them. You will need a 7″ wide storage container to store these:)
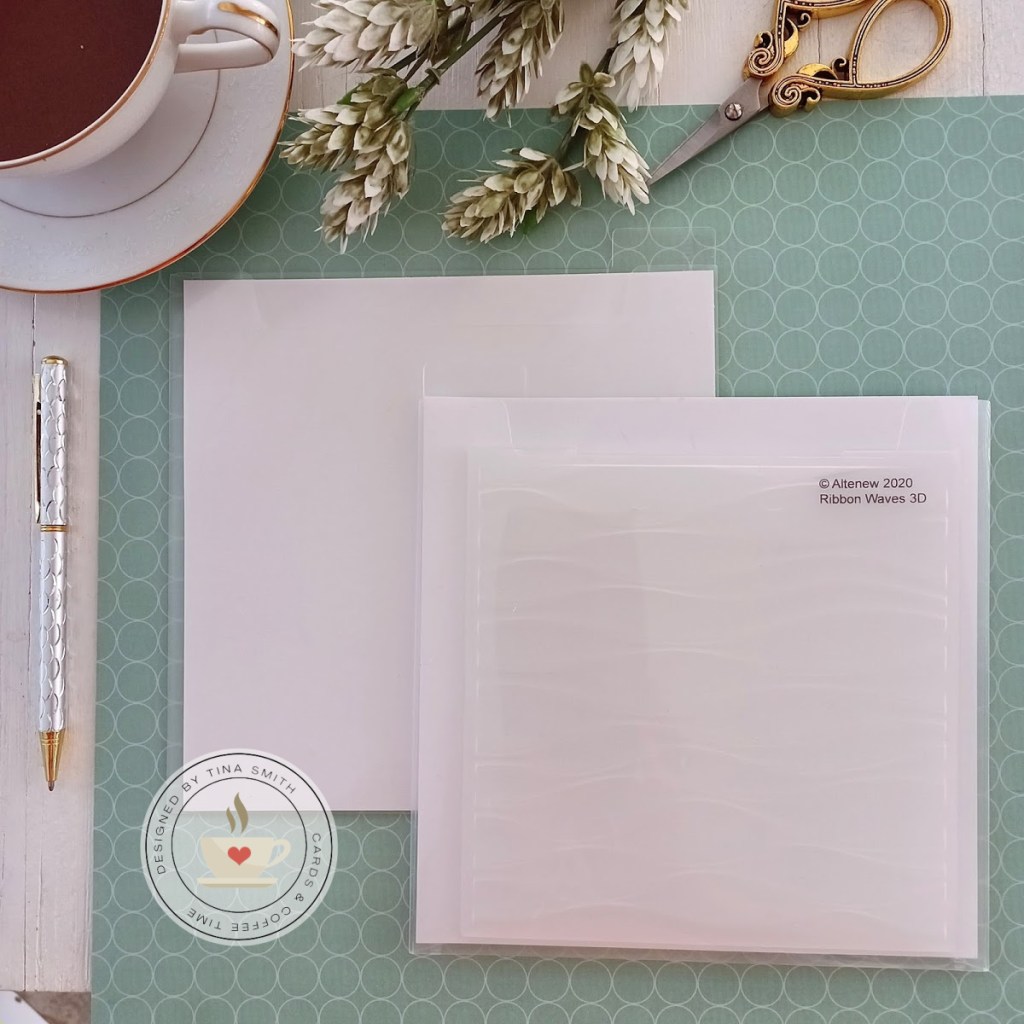
The Totally Tiffany 6×6 Fab File Refill , same as above for my XL 6×6 Embossing Folders. These pockets are on the expensive side for me. Only 5 come in a package. My justification is that they are heavy duty and will last a long time.
I try to label all my crafty goodies and for convenience I like the DYMO LetraTag Handheld Label Maker. For larger 6 x 8 Stamps & Slimline Die storage I use the Avery Elle EXTRA LARGE Stamp and Die Storage Pockets 6.75 x 9.375 Set of 50. I also add a white cardstock insert that measures 7-5/8″ x 9-1/2 to my XL storage pockets.
You can watch how I create all my storage along with a mini craft room tour below or over on my YouTube Channel, Just Click Here. Time to grab your coffee friends and let’s get to crafting! Have a Beautiful day! Hugs, Tina


Fantastic video. Love your craft room. Would love to see you big desk and how you organized it. Great tips on storming stamps and. Dies. Thank you.
LikeLike
I can’t find that little Le Halo pen caddy with the rubber flowers on Amazon. Can you clarify?
LikeLike
Hi Barbara, I listed the link in the description area of the youtube video (desk organizer).
LikeLike